


Grafting Cutter Set
Grafting Cutter Set
Couldn't load pickup availability

Today Offer
Today Offer
♥️ PREPAID OFFER: ₹30 additional discount on prepaid orders - using UPI or Net Banking or Cards.
Perfect Grafting Made Easy! 🌿🌱✂️
Create perfect grafts in seconds — no expert skills needed!
Our Grafting Cutter Set is designed for gardeners who love growing fruit trees, flowers, and plants with precision.

🌱 Benefits of Using Grafting Cutter Set
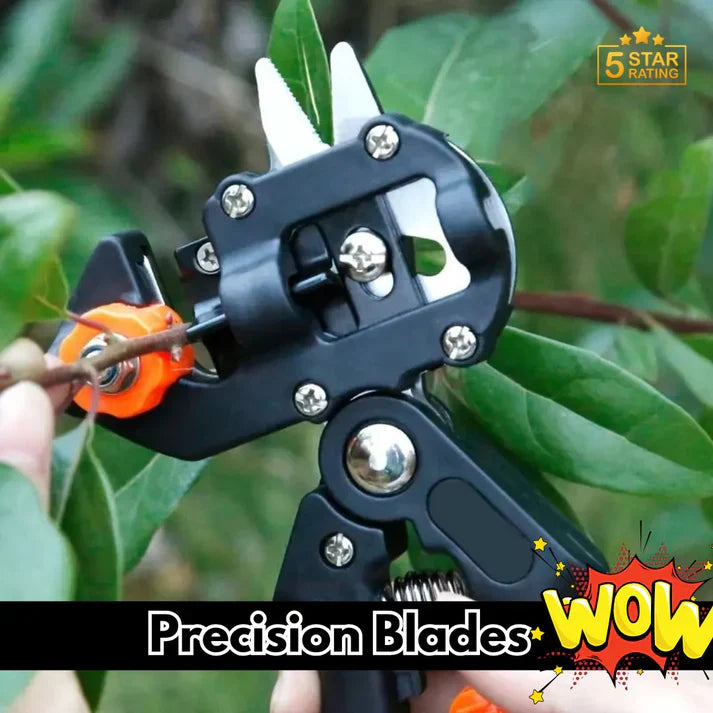
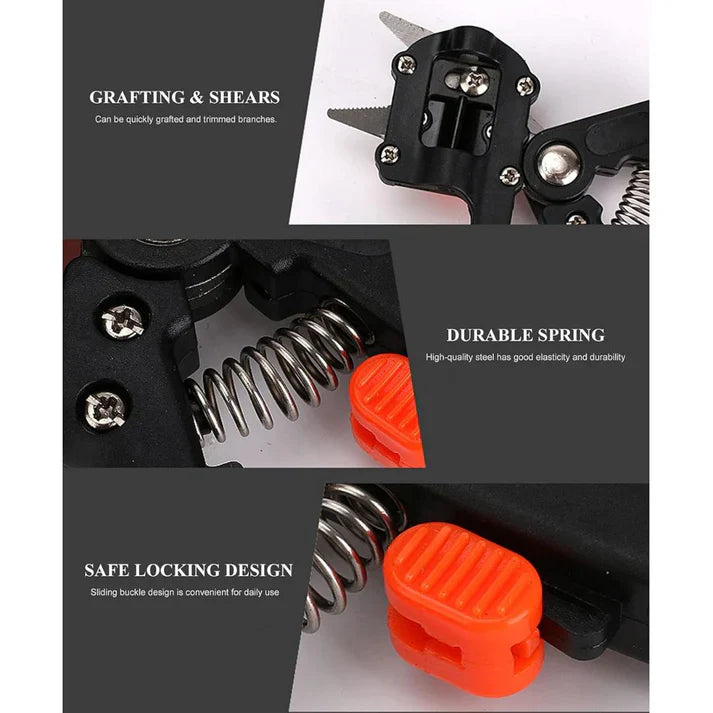
🔪 1. Perfect & Clean Cuts
The sharp, high-quality blades ensure smooth and matching cuts for both scion and rootstock, increasing grafting success.
🌳 2. Increases Plant Survival Rate
Accurate cuts help the plant tissues connect properly, promoting faster healing and stronger growth.
⚙️ 3. Easy to Use
Designed for both beginners and professionals — press and cut! No special skill required.
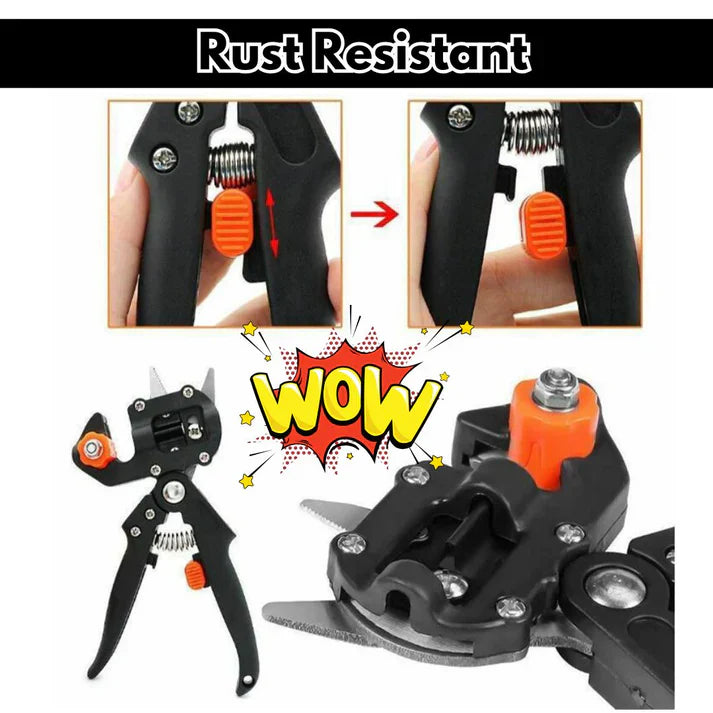
💪 4. Durable & Strong Build
Made with premium carbon steel and ergonomic handles for long-lasting performance.
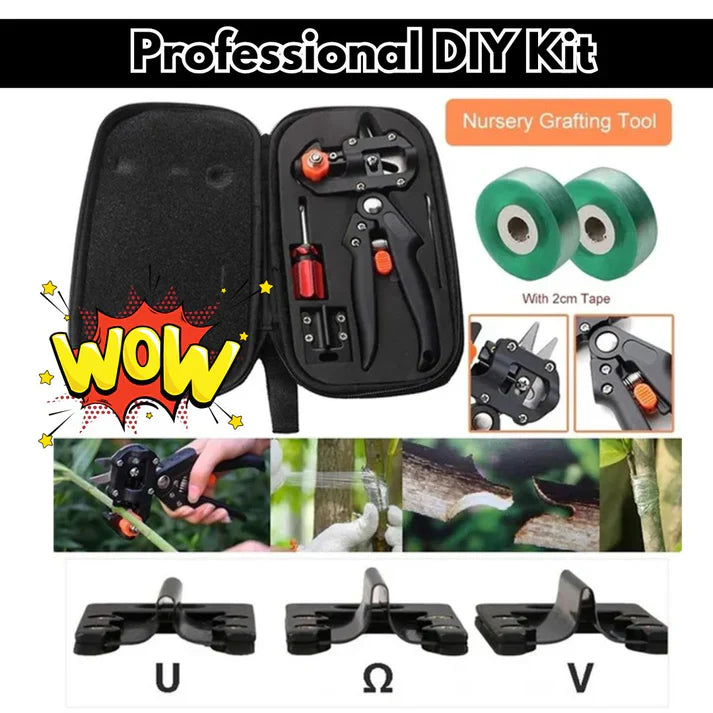
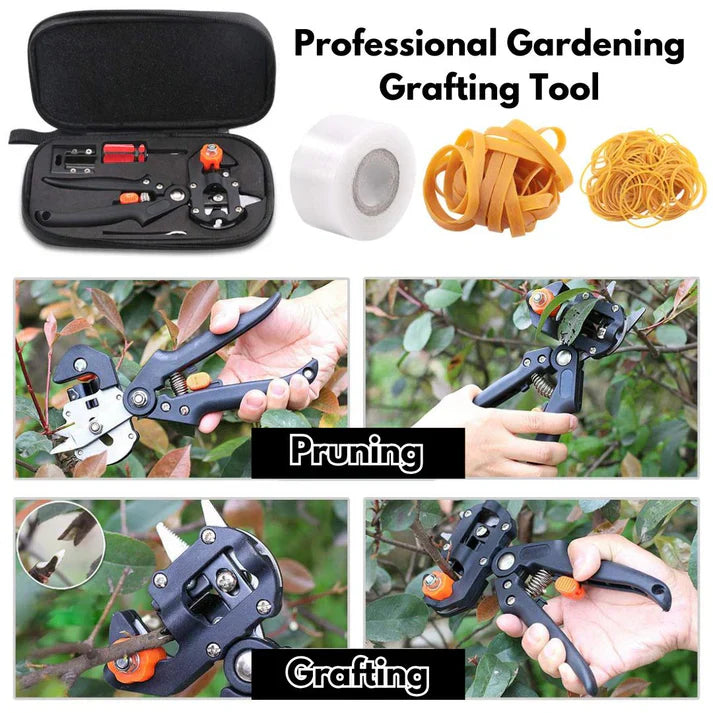
🧰 5. All-in-One Kit
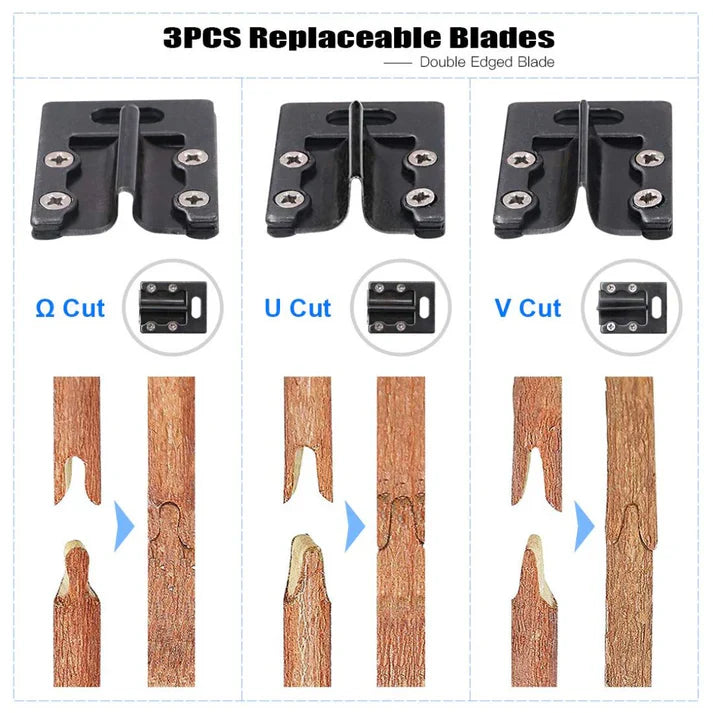
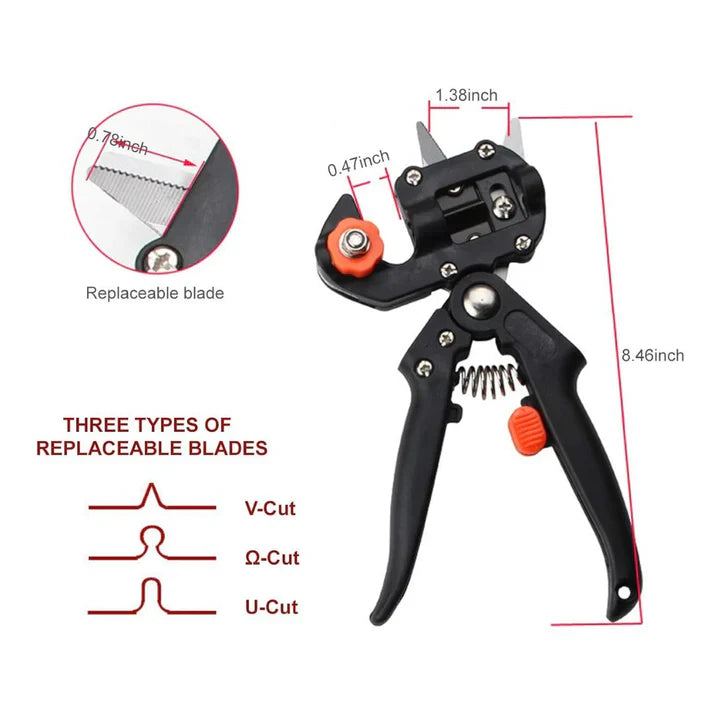
Comes with multiple blade shapes (Ω, V, U), replacement blades, and grafting tape — everything you need in one set.
🌼 6. Saves Time & Effort
Cuts perfectly in one go, unlike manual knives that require longer and more precise movements.
🍎 7. Ideal for Many Plants
Perfect for fruit trees, flowers, vegetables, and ornamental plants.
💚 8. Professional Results at Home
Get nursery-level grafting results right in your garden with minimal effort.

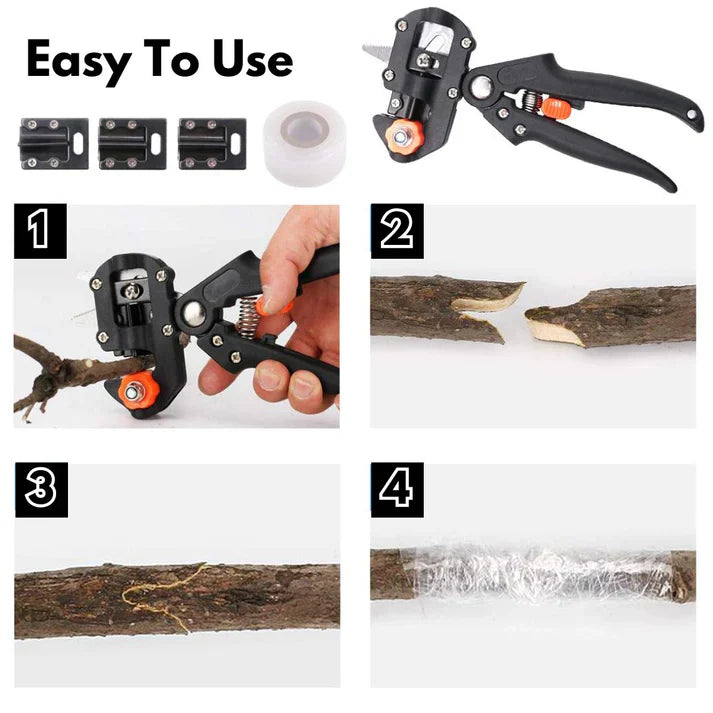
🌱 Step-by-Step Guide to Use Grafting Cutter Set
Step 1: Choose Healthy Plants
- Select a healthy rootstock (the base plant) and a strong scion (the cutting you want to graft).
- Both should be about the same thickness for best results.
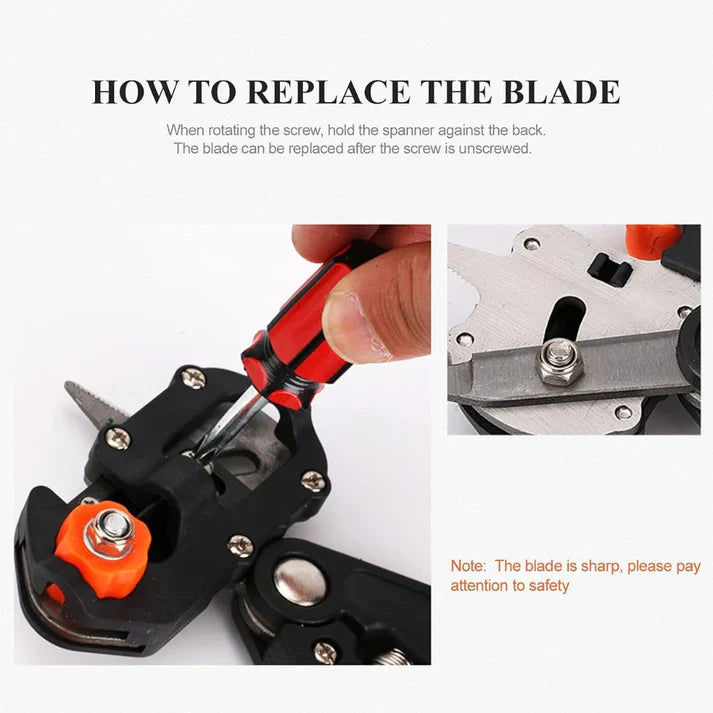
Step 2: Clean the Tools
-
Before you start, sanitise the grafting cutter blades using rubbing alcohol.
- This prevents infections and improves the success rate.
Step 3: Cut the Rootstock
- Use the grafting cutter blade (usually shaped like Ω, V, or U) to make a clean cut on the rootstock.
- Make sure to cut it in one smooth press for an even surface.
Step 4: Cut the Scion
- Take your scion (the cutting from another plant).
- Use the same blade shape (Ω, V, or U) to make a matching cut on the scion.
- The two cuts should fit perfectly together like puzzle pieces.
Step 5: Join the Cuts
- Fit the scion and rootstock together tightly.
- The cambium layers (green parts just under the bark) should be touching — this is crucial for graft success.
Step 6: Secure the Graft
-
Use grafting tape or rubber bands from the kit to tightly wrap the joint.
- Make sure no air gets in, but don’t wrap too tightly to damage the plant.
Step 7: Protect the Graft
- Optionally, apply grafting wax or sealant over the joint to prevent moisture loss or infection.
Step 8: Care After Grafting
- Keep the plant in a shaded, moist area for 1–2 weeks.
- Water regularly, but don’t overwater.
Specification:
- Package Contains: Pack of 1
- Material: Alloy Steel
Got Questions?
Got Questions?
We are here for you. If you have any questions related to our products, website, or your order - please contact us.
We try and resolve all queries within a day.
Delivery and Shipping
Delivery and Shipping
Shipping: All orders are shipped within 2-3 business days. This depends on the inventory level because some products are made on-demand. Once the order is shipped, the email notification with tracking number is sent to the customer.
Delivery Time: The delivery time depends on each product. Please expect the delivery time to be 5-10 days.
The delivery time may be longer during season and national holidays.
Return & Replacement
Return & Replacement
Refund and Replacement
Our policy lasts 5 days. If 5 days have gone by since your purchase, unfortunately, we can’t offer you a refund or replacement.
Replacement/Exchange: If you receive a defective product, we will send you a new replacement as soon as possible. We will pick up the defective one within 2-3 working days. Or If you want to exchange with other products listed on our website with the same price, we will accept the exchange.
*Terms and Conditions apply.